
One of the basics of survival is shelter. Exposure can easily kill a person, faster than dehydration or lack of food. In most cases shelter is essential for someone who is trying to survive in the wilderness. These are our top five shelters that you should know how to make:
1. Lean-To

The lean-to is the classic survival shelter that people know of. They take a little time to make but they are easy to construct and are good to use in many situations.
A lean-to is exactly what it sounds like. It consists of a leaning roof which creates a top to your shelter and slopes down either to a back wall, or to the ground. There are walls on each side of the roof, and the front of the shelter is left relatively open.
To create a lean-to you usually need some type of cordage, though it is possible, if somewhat difficult, to create a lean-to without cordage. Generally when choosing a spot, you want two trees to act as starting supports for each side of your lean-to. If you don't have two trees that work for this you can always make your own supports. Stacking your horizontal roof beam on top of two vertical supports, along with two sloping supports will also make a tripod type of support system on each side of your shelter.
A sturdy branch is lashed horizontally between the two trees. This gives you a support beam on which you can start laying branches and larger sticks to create a sloping roof. Over top of these sticks you can lay smaller sticks, leaves, bark and boughs to create a roof that help keep heat in, and prevent moisture from coming through.
A good thing to remember if you are using something like boughs, make sure the needles point down towards the ground, and that your top layers are at the top of the roof. This will help create a shingles effect to shed water.
2.Snow Cave

A snow cave works similar to how a debris hut works, by placing a lot of insulating material between you and open air. Therefore, the bigger the pile of snow you have to work with, the better your shelter will work.
If you can find a pile of snow to work with, then you already have part of your shelter done. Under the assumption that there are no piles of snows sitting around waiting for you though, the firs thing you have to do is create one. Remember, the bigger the better.
Once you have a pile of snow, it is time to start digging. What you want to do is dig out a cavity in the pile of snow that you can fit in. However you don't want your cavity to be too large, and allow heat to escape. The closer the walls of your shelter are to you, the warmer it will keep you.
Once you have the shelter dug out, small walls can be piled up around the entrance to help block wind, or a tarp can be put up over the entrance to help keep wind out and body heat in.
3. Tarp Shelter

In a survival situation a tarp is a wonderful thing. A tarp gives you something that can make making a shelter much easier and a much less time intensive effort.
You can use a tarp to make all types of shelter from a shade cover to a teepee. However perhaps the easiest way is simply to drape it across a rope, or a branch, and tie down the ends. It creates a tent over top of you to keep off moisture and it only takes a few minutes to make.
If you find yourself in a colder situation a tarp can also be used for the beginnings of a shelter. It works great as an initial layer for a roof, or as a door to a shelter.
4. Swamp Bed/Raised Platform
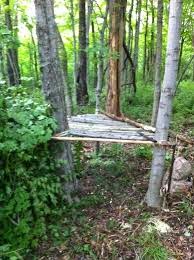
In a very humid or tropical climate or a swamp, a raised platform is the way to go. In these types of climates you have two main concerns: bugs and critters, and water . If your in a swamp there may not be any dry land to set up a shelter on, and in a tropical climate the bugs and critters are everywhere on the ground. A raised platform gets you off the ground away from these dangers to help you survive. A raised platform can also be used in conjunction with a lean to or tarp type of set up as well if rain is likely.
To make a raised platform, you first need support poles. If you can find trees close enough together to make a platform in between, those are probably ideal. However you can also make your own support poles with branches that have been set up vertically.
The next thing you are going to need is a good amount of cordage for lashing other sticks horizontally to your support poles. These horizontal beams will act as the boundaries for you platform, and will support the over all platform.
Once you have your horizontal beams securely in place, it is time to start laying more sticks, this time across your horizontal beams. These do not need to be lashed to the horizontal beams, but it could be helpful.
With enough sticks placed across the horizontal beams, you will get a platform. This can then be made more comfortable with leafy vegetation to act as sleeping mat if you have time.
As an alternative to sticks, you could also use cordage between your horizontal beams. Criss crossed back and forth between the horizontal support beams, you would get less of sleeping platform, and more of a hammock like platform. Just make sure you have enough cordage to support you and to prevent you from slipping straight through your platform.
5. Debris Hut

Debris huts are one of the best shelters out there. They are simple, efficient, and require no cordage. They are made simply out of the materials you can find around you.
A debris hut starts with a tripod made with one long stick, creating the peak of the roof of your shelter, and two shorter sticks that make up the entrance.
Once your tripod is set, and you know you will fit inside, it is time to add more sticks. These sticks should be propped up along the long branch, like ribs, creating a roof. Once the structure of your roof is made, you should add leaves and smaller sticks on top to create a large pile of debris, which will act as insulation.
Remember, when making a debris hut, just as with a snow cave, you want there to be very little space between you and shelter walls. This keeps more of your body heat in, and less is pulled away by the air.
These types of shelters are all fairly easy to make, and therefore easy to practice as well. If you ever find yourself in a survival situation, you will be glad to know how to make these, because they might just save your life.
~Sara
Thanks
ReplyDeleteI have read a bunch of postings on basic survival shelters, but I have to admit that your posting is the most reliable one I have come across so far. I know of the Lean-To shelter, but I would like to know how to make a Tarp shelter. See basics for building a survival shelter here: http://wildernessmastery.com/survival/building-a-survival-shelter.html
ReplyDeleteYep, These types of shelters are all fairly easy to make. I'll trys this!
ReplyDeleteBrilliant post. Thanks!